
Add and manage vehicles
Add cars to your fleet, edit their details, upload photos, set amenities, and retire or restore vehicles.
Your fleet lives under Fleet in the left-hand menu. You can search, filter by category, status or location, and switch between grid and list views.
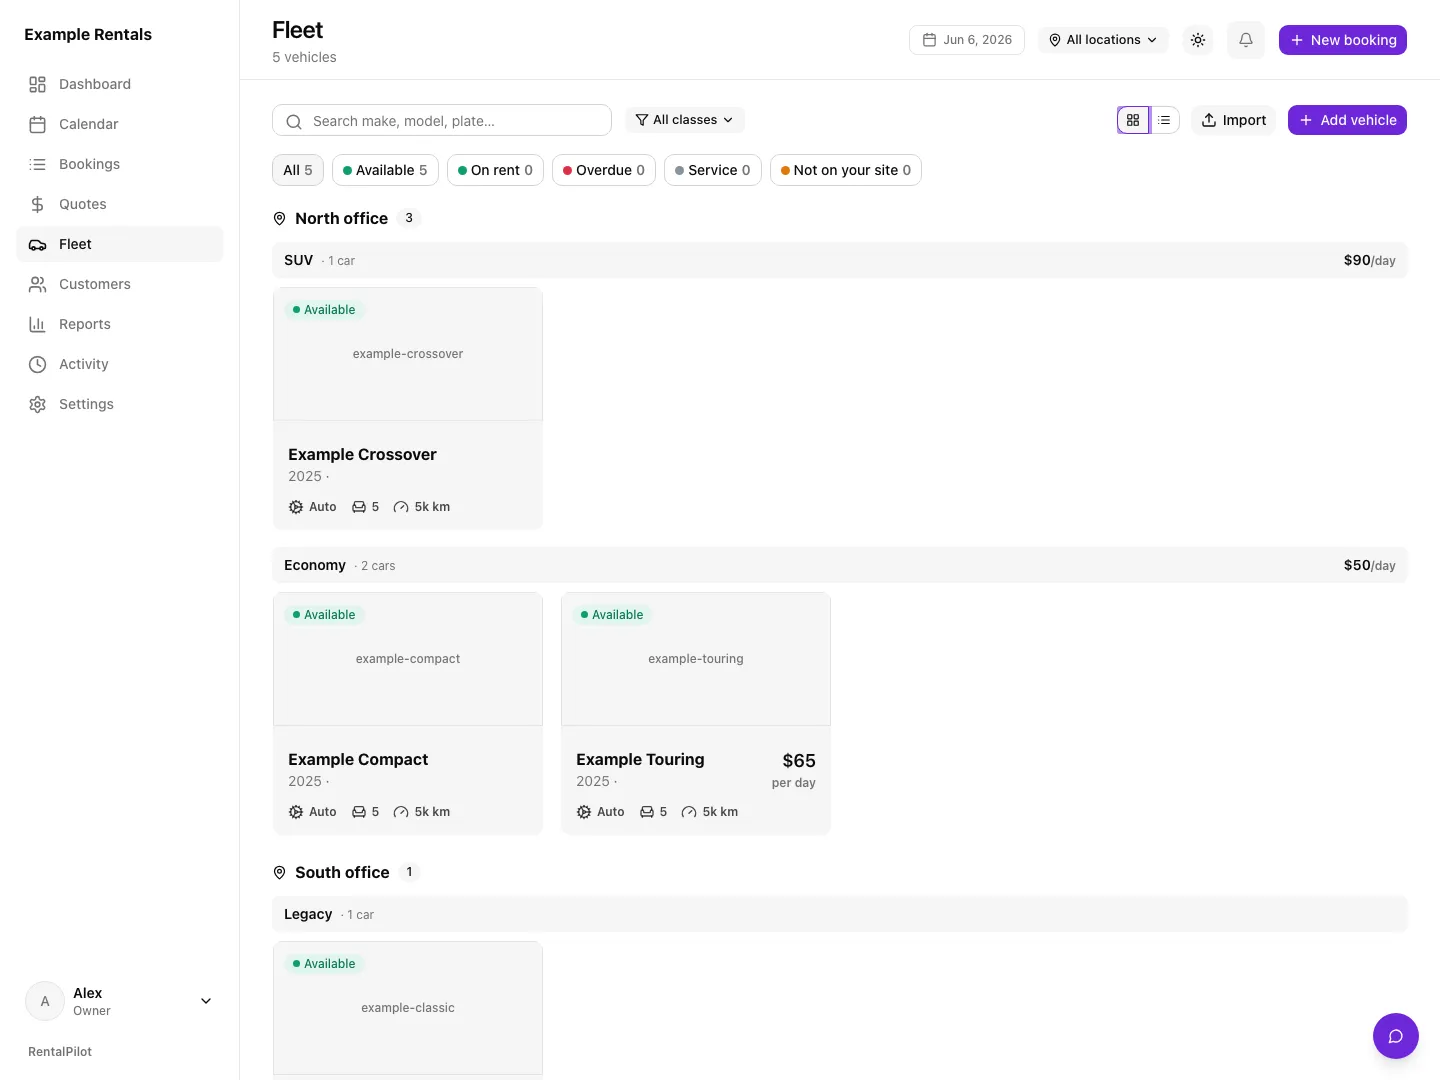
View your fleet by category
With All classes selected, each category has a heading showing its name, the number of matching cars and its daily price, when one is set. Categories follow your order in Settings → Pricing & catalog. Cars in a category outside that catalog appear afterward.
In both grid and list views, a car shows its own daily price when it differs from the price in the category heading. If a category has no shared price, each car shows its own. Selecting one category removes the category heading and shows the daily price on every car again. These views display your existing rates; changing a filter or view does not change a price.
When viewing all locations in a fleet with several branches, categories group within each branch. Cars with no assigned branch appear under Available everywhere. Choosing a branch in the header also includes those cars. Search and status filters update the cars and counts in each category.
Add a vehicle
Choose Add vehicle and fill in:
- Make, model, year and an optional trim
- Category — your own vehicle classes (managed in Settings → Pricing & catalog)
- Plate — must be unique across your fleet
- Daily rate — the base price per day (must be above 0). If the car’s category has a price, the car takes it; see one price per category
- Transmission, fuel, seats, luggage, and optionally odometer, VIN, colour and location
Fill it in from the VIN. Type the VIN, or choose Add a photo of the VIN sticker (or drop a photo on it) to read the VIN barcode on the driver’s door frame. This reads the barcode only—it does not read printed VIN text. On a phone it opens the camera; the image is processed on your device, discarded after the scan, and never uploaded or kept. A typed VIN is looked up as soon as all 17 characters are in. A VIN read from a photo is not sent anywhere until you’ve checked it against the sticker and chosen Find vehicle details; the same button appears to try again if a lookup fails. It can suggest the year, make, model and sometimes trim; check the suggestions and choose Use these details. It never supplies a photo, category, daily rate, plate or location. No VIN to hand, or did scanning or lookup fail? Keep entering the vehicle manually, or use Browse vehicle choices for year, make and model.
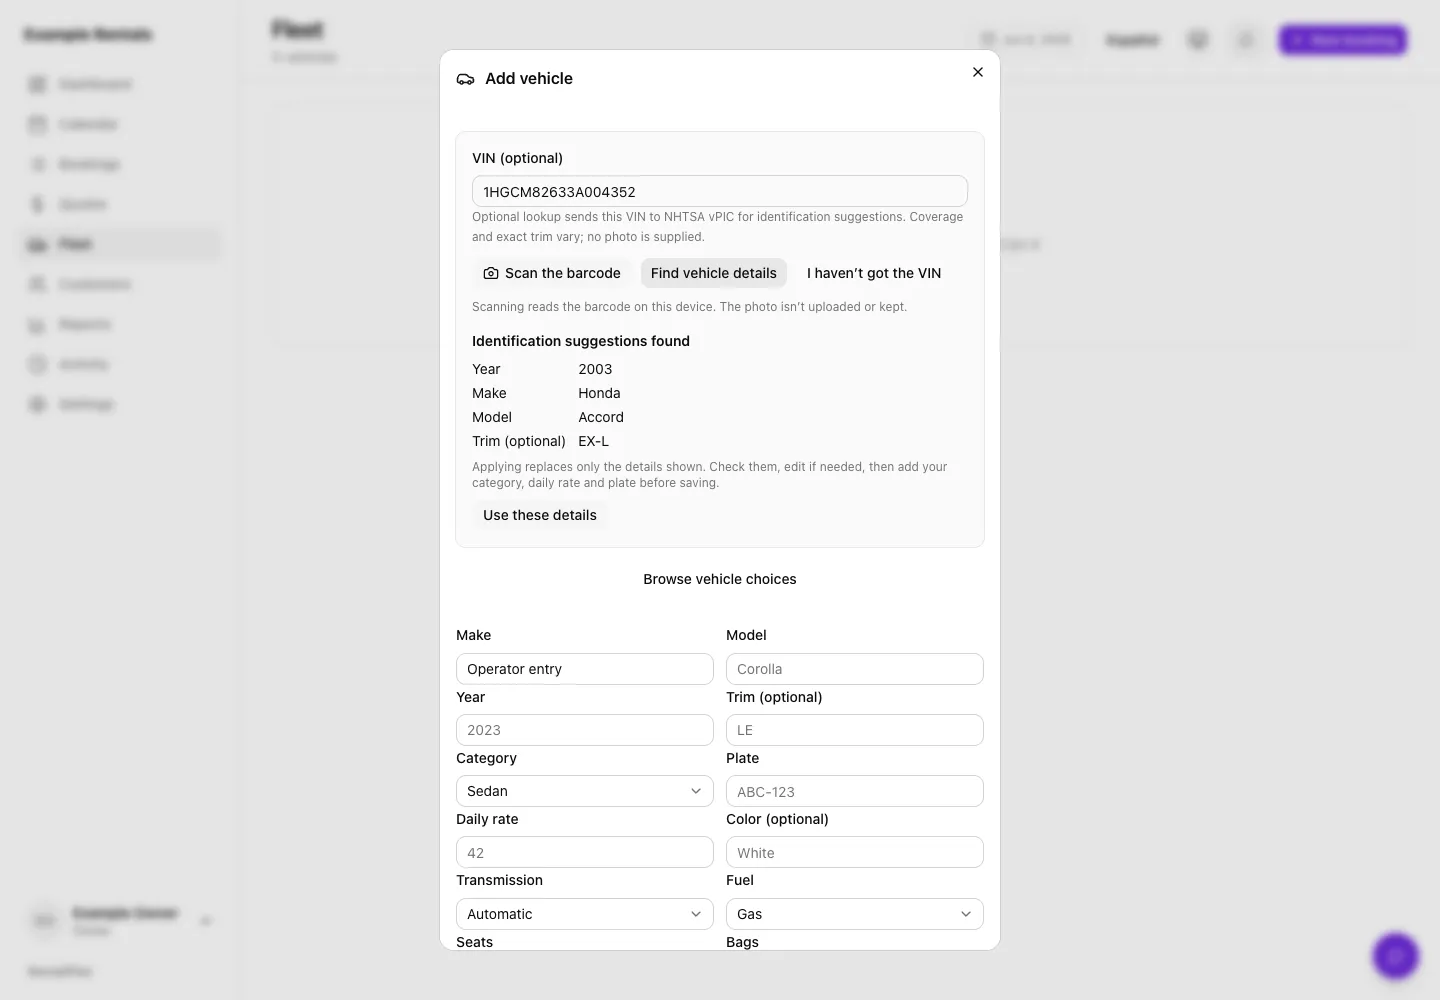
Add photos of your own real vehicle from its detail page after saving. Until you do, renters see RentalPilot’s standard photo of that make and model, from the right generation for its year: the car on a white background, front three-quarter from the driver’s side, plate blanked. Your own photo always replaces it, and nothing is changed on your car.
Save and you’ll land on the vehicle’s detail page. (Have a whole fleet to load? See Import your data.)
Location: set the branch a car belongs to, or leave it blank to make it available at every location. Blank-location cars show up at all your branches — handy for a vehicle you move between sites. See Locations & pick-up points.
Edit details and photos
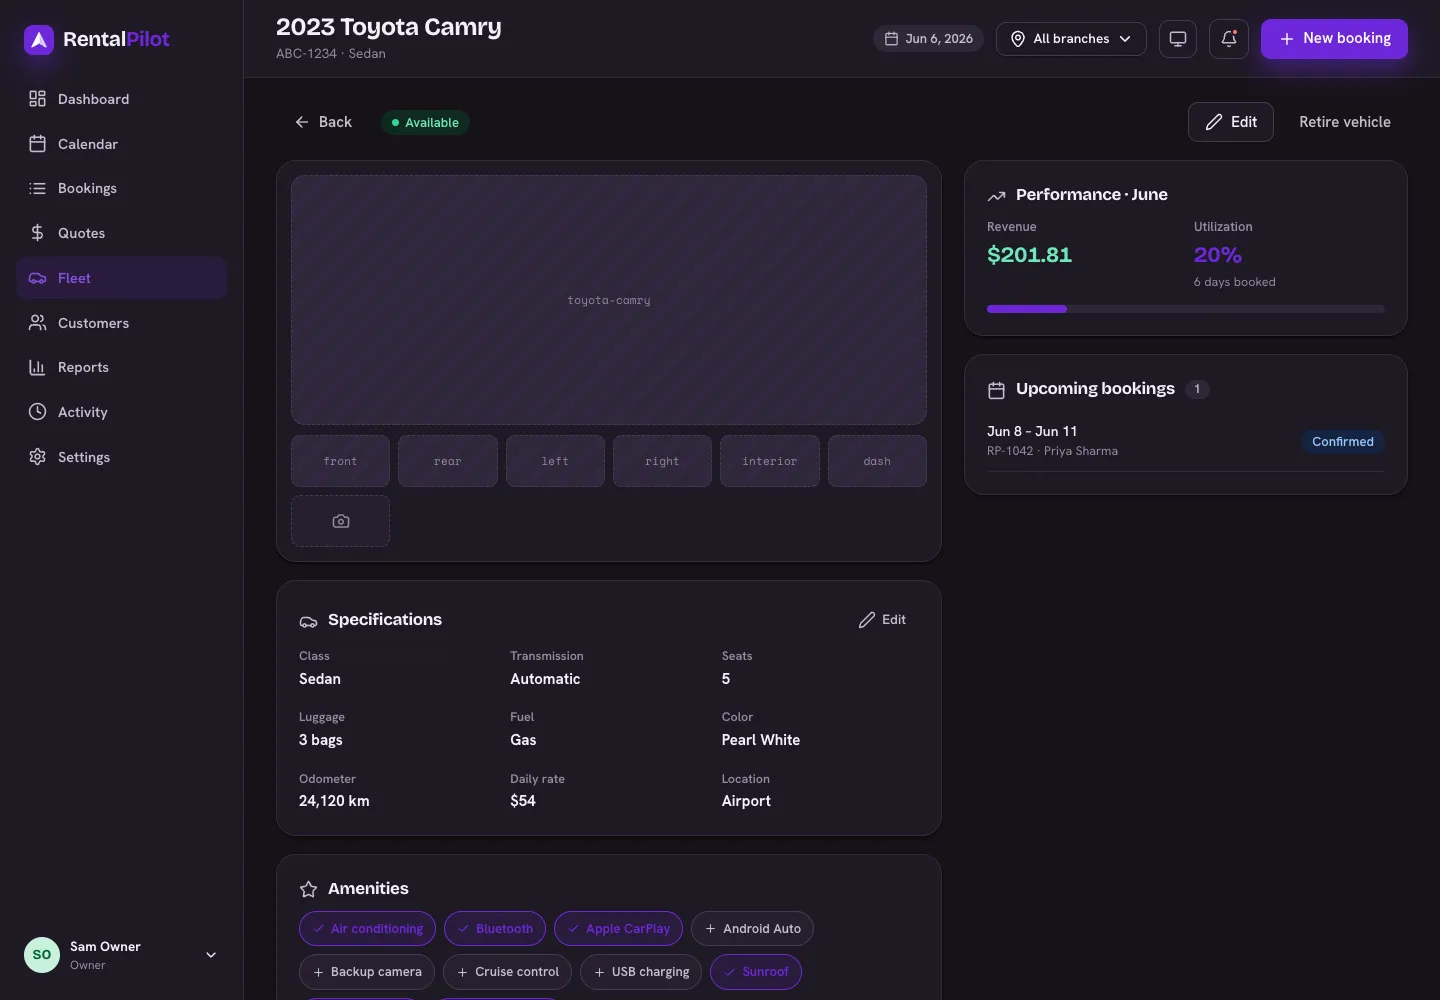
On the vehicle’s page:
- Edit updates any of the specs above.
- Add photo uploads images (up to 12). The first photo is the main one renters see; you can remove any.
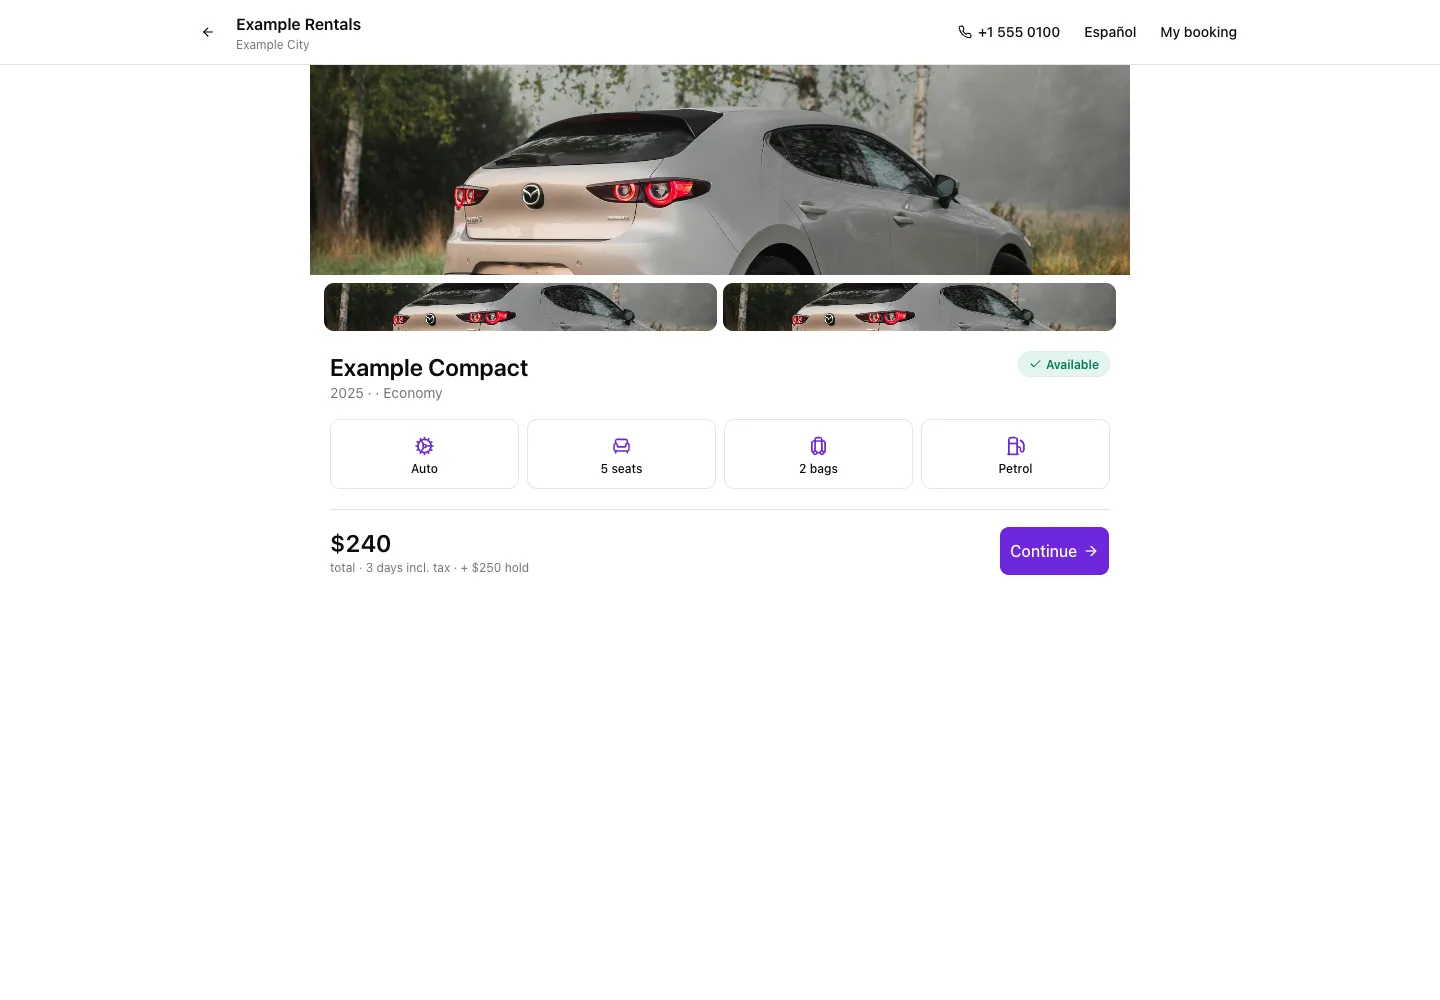
Renters see the main photo in search results, on the vehicle page and in their booking confirmation. The vehicle page also shows up to four additional uploaded photos. A vehicle without a photo of its own shows our standard photo of its make, model and generation. If we don’t have one for that car, or an image can’t load, renters see a drawing of its body type instead. We never show a photo of a different model. Your owner preview of the booking site shows the same photos renters see.
Upload photos as JPEG or PNG. Most browsers can’t show HEIC (the format iPhones save photos in) or TIFF, so RentalPilot won’t take a vehicle photo in those formats. If you have an iPhone photo on your computer, open it and save or export it as a JPEG first; uploading straight from the iPhone converts it for you. A photo added in one of those formats before this check isn’t shown to renters, and its detail page marks it with a warning: remove it and upload a JPEG or PNG copy.
Set amenities
Toggle the amenities this vehicle has (Apple CarPlay, roof rack, etc.). Renters see these as badges and can filter by them. The amenity list itself is managed in Settings → Pricing & catalog.
Retire or restore a vehicle
When a car leaves your fleet, choose Retire vehicle. It’s hidden from booking and from your active fleet, but its history is kept. Retired vehicles appear in a collapsible Retired section, and Restore to fleet brings one back.
To take a car off the calendar temporarily (rather than retire it), block it for maintenance — see Maintenance & fleet alerts.
Return to an optional guide
If you opened Fleet from the optional account guide, use Return to optional guide after reviewing or saving a car. The guide refreshes your saved details. Existing cars and history stay in place, and your current account limit still applies when adding another car.
Need a hand? Contact us.